How to Customize the FolderIco Explorer Menu
FolderIco is a powerful tool that lets you quickly change default folder icons to something more meaningful and visually distinct. By default, FolderIco provides a variety of predefined icons accessible via the Explorer right-click menu. However, if you want to personalize this menu further by adding or replacing icons, follow the steps below.
Step 1: Open the "FolderIco"main window
- Right-click the any folder.
- In the Explorer context menu, select "Change Folder Icon" to view the available icons.
- Click "More icons" at the bottom of the list to open the FolderIco main window.
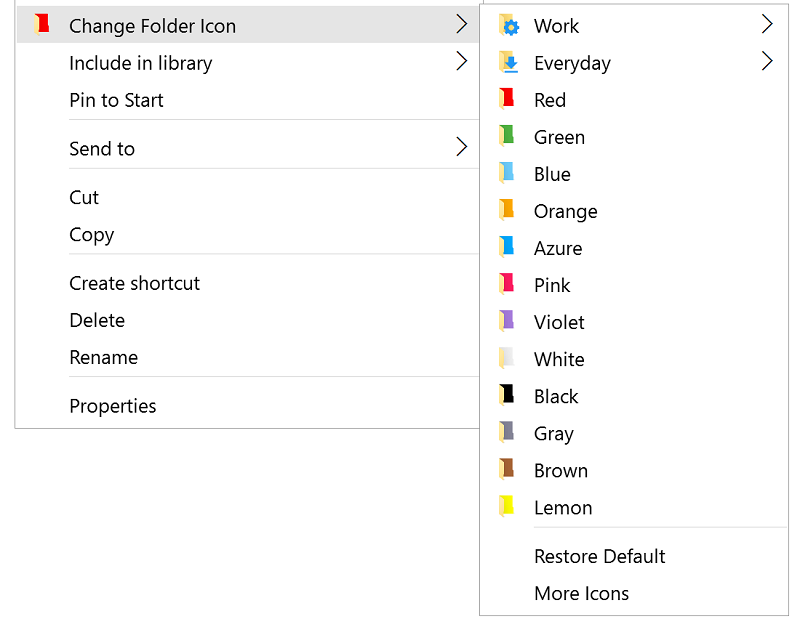 Alternatively, you can start FolderIco from the Start button.
Step 2: Adding Custom Icons to FolderIco
Before adding new icons to the Explorer menu, they must first be imported into FolderIco.
-
Creating or Importing an Icon Library: Click the "Import" or "Create" buttons in the header section. Once a library is created or imported, you can add custom images to it.
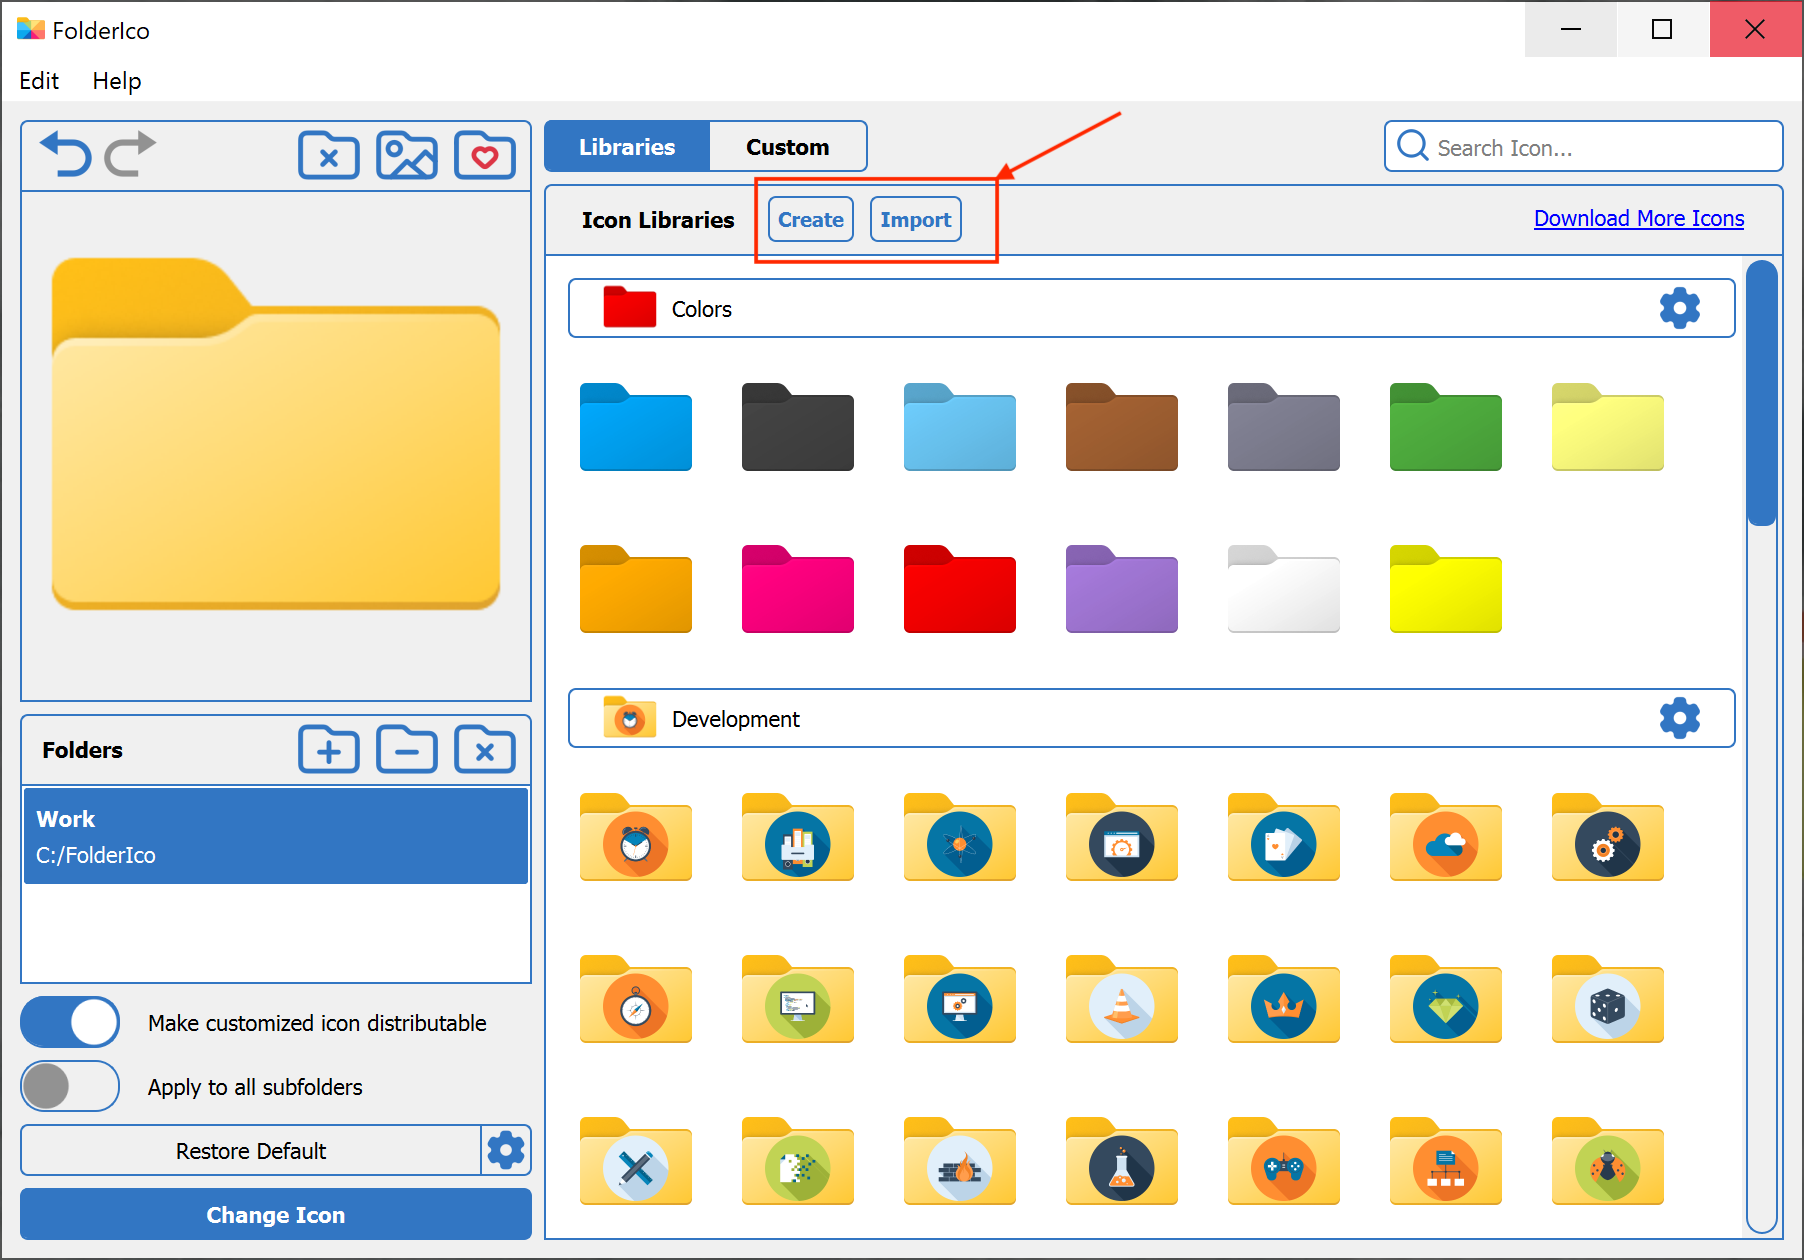
-
Adding Icons to an Existing Library: Choose an existing library and click "Add Icons To Library" to select your desired image. FolderIco supports multiple image formats and will automatically convert them into ICO format.
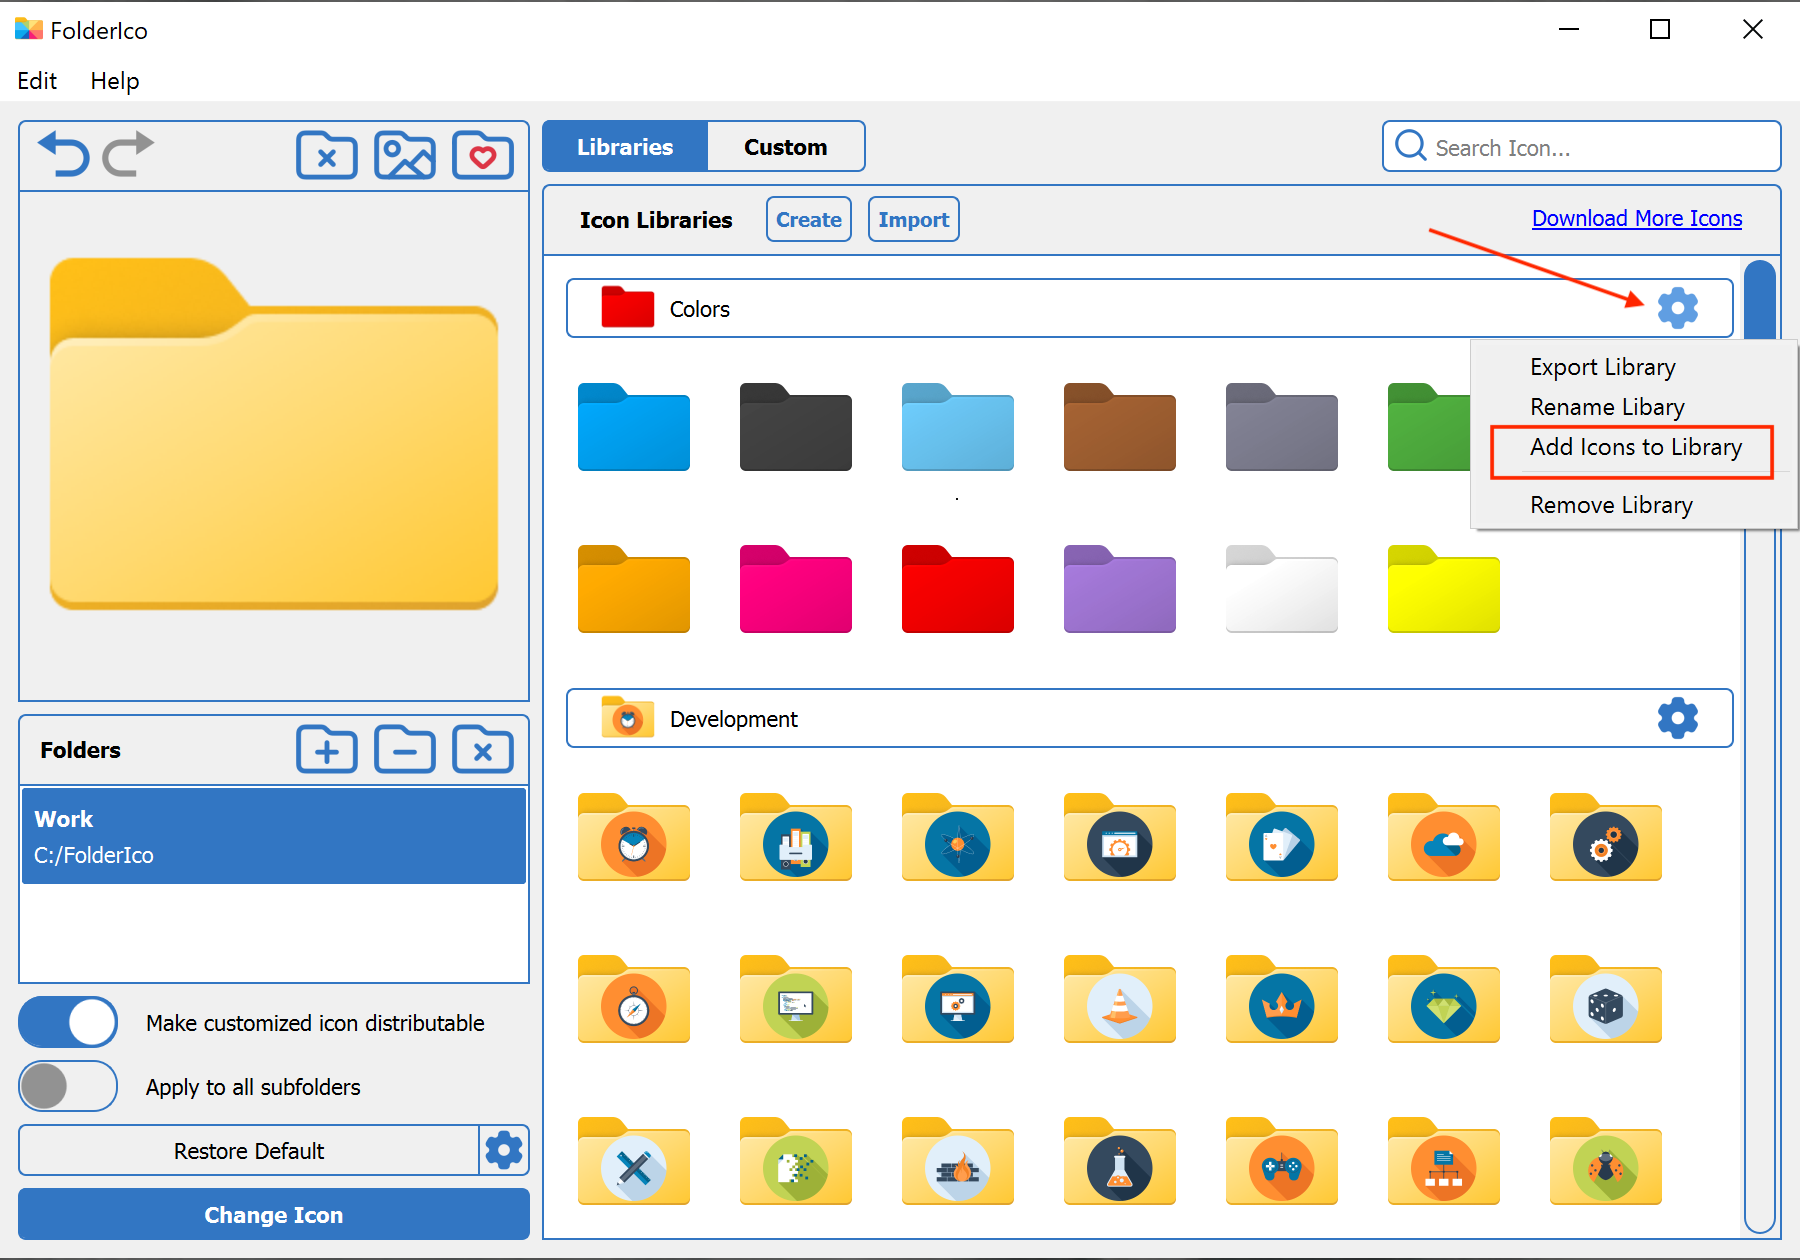
Step 3: Editing the Context Menu
To modify the FolderIco right-click menu:
- Navigate to "Edit -> Menu Editor".
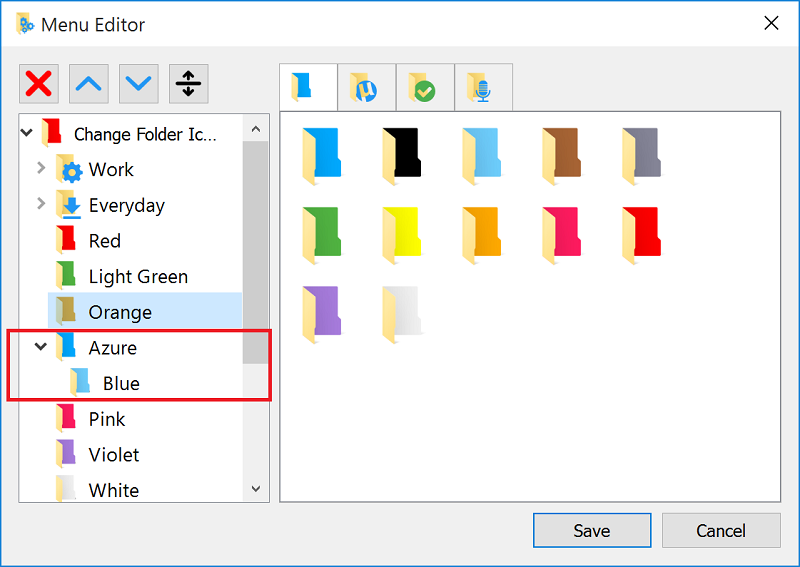
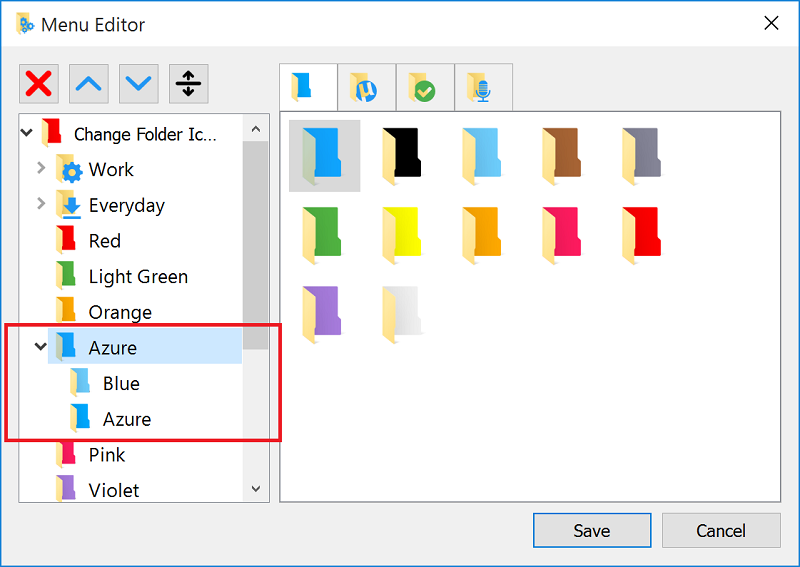
- The left panel displays the current context menu structure, while the right panel lists all available icons.
Customizing the Menu:
-
Renaming Icons: Double-click an existing icon and enter a new name.
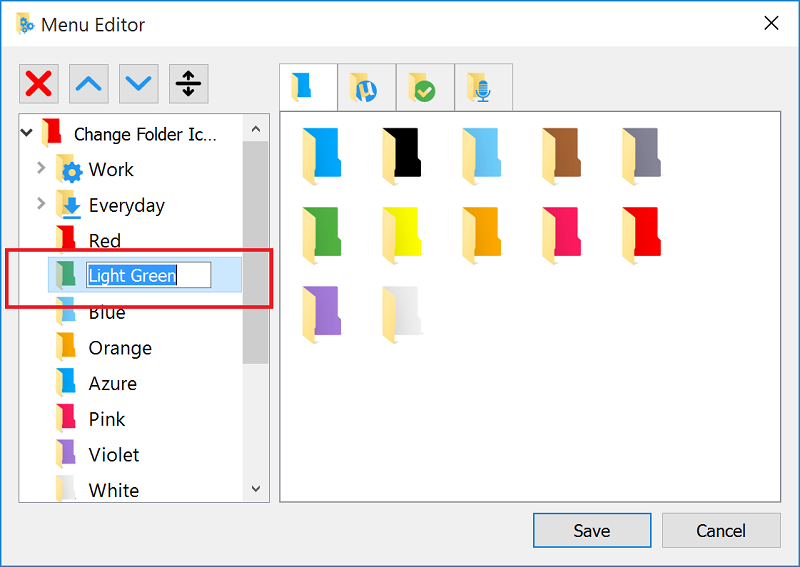
-
Creating Categories: Drag one icon over another to group them under a new category.
-
Adding a New Icon: Drag an icon from the right panel and place it where you'd like in the menu.
- Managing Items: Use the upper buttons to delete, reorder, or add dividers between menu items.
Step 4: Save and Apply Changes
Once you've customized the menu, Click "Save" to store your modifications.
Your personalized FolderIco menu is now ready! Enjoy a more organized and visually appealing folder structure tailored to your needs.